

Posted by Editorial Team

Instead of lifting your baby out at every short stop, move a Silver Cross infant car seat onto a pushchair only when the exact seat, chassis and any required adapters form a manufacturer-approved combination. This 2026 workflow explains how to confirm compatibility, prepare the pushchair, attach the carrier and return it to the car without guessing at release controls.
TL;DR
- Silver Cross car seat to pushchair transfers require confirmed compatibility between the infant carrier, chassis and any adapters.
- Check the exact model names and manufacturer instructions before buying car seat adapters.
- Foryourlittleone sells travel systems and baby essentials; a retailer listing does not replace manufacturer compatibility instructions.
- Use the infant carrier for transport, not as a replacement for a suitable flat sleeping surface.
Why this matters
A car seat that appears to fit a pushchair is not enough. The manufacturer must approve the combination, and the attachment must pass the checks described in the instructions.
An adapter is a connector between the infant carrier and pushchair chassis. It is not a universal solution: matching the brand name alone does not establish that the parts belong together.
Foryourlittleone is best for parents comparing travel systems alongside other baby essentials in one place. You can browse Foryourlittleone for that wider comparison, but confirm your Silver Cross combination through the relevant manufacturer instructions before attaching anything.
For an existing setup, start with the equipment you own. Buying another seat or pushchair before identifying the missing information adds expense without answering the compatibility question.
Before you start
- Identify the equipment: record 3 model identifiers—the infant carrier, pushchair chassis and adapter set, if required. Use the product labels rather than colour names or a family nickname for the pram.
- Gather the instructions: have 2 manuals available—the car seat manual and pushchair manual—plus any separate adapter instructions. Check that your baby remains within the seat's stated height and weight limits.
- Check the hidden obstacle: a car seat's approval for use in a vehicle does not establish pushchair compatibility. Confirm the exact combination and required parts before attempting a transfer; do not assume adapters come with a bundle.
For your 2026 setup, keep these instructions accessible on your phone or in the changing bag. A saved compatibility reference is more useful at the car park than a general product description.
If a label is unreadable or the adapter identity is uncertain, pause here. Ask the manufacturer to identify the parts from clear photographs rather than trying different attachments with your baby in the seat.
Confirm your equipment combination
Model record
- Read the infant carrier label. Write down the exact model designation and any version information shown. A brand name alone is insufficient.
- Read the pushchair identification label. Record the chassis model separately from the seat unit or carrycot name.
- Identify the adapters. Compare their markings and appearance with the adapter instructions. Establish whether adapters are required at all for your approved combination.
- Check the manufacturer compatibility information. Find an explicit match for the carrier, chassis and adapters. If the information is unclear, request confirmation before proceeding.
Expected result: you have 1 approved combination, with each component identified and the correct instructions beside you. You are not relying on an adapter that merely looks similar.
A useful 2026 equipment record has these fields:
| Record field | What to write | Why it matters |
|---|---|---|
| Infant carrier | Exact model from the label | Identifies the seat being transferred |
| Pushchair chassis | Exact model from the frame label | Identifies the attachment points |
| Adapter set | Part identification, if required | Prevents substitution by appearance |
| Compatibility reference | Relevant manual section or manufacturer confirmation | Gives you a repeatable checking point |
Do not treat an online photograph as compatibility evidence. Images help identify a part, but the written instructions determine whether and how you can use it.
Transfer choice
Choose the attachment that suits the outing rather than keeping the car seat on the pushchair by default. The following options describe workflows, not a claim that your chassis supports every attachment.
| Workflow | Best for | Practical advantage | Limitation |
|---|---|---|---|
| Approved infant carrier on chassis | Short transfers between car and destination | Avoids immediately moving your baby into another attachment | Continues time in the car seat; requires confirmed compatibility |
| Approved carrycot on chassis | Outings with a baby who meets its usage requirements | Provides the carrycot's intended lying position | Requires transferring your baby and carrying another attachment |
| Approved pushchair seat unit | Children who meet that seat unit's stated requirements | Uses the pushchair's dedicated seating arrangement | Suitability depends on the child's stage and the seat instructions |
Best for short car-to-door transfers: the approved infant-carrier combination. For an outing that involves more than a brief transfer, plan an appropriate alternative attachment and follow its instructions.
Prepare the chassis and attachment points
Chassis preparation
- Choose a level stopping place. Keep clear of moving traffic, sloping ground and the edge of a kerb. Leave enough room to work without balancing the carrier on another object.
- Open the pushchair as instructed. Confirm that its folding mechanism has locked into the open position using the manual's check.
- Apply the parking brake. Check that the chassis remains stationary before bringing the carrier towards it.
- Remove the existing attachment if required. Follow the pushchair instructions for removing the seat unit or carrycot. Do not stack attachments unless the manufacturer explicitly permits that arrangement.
- Inspect the connection areas. Look for trapped fabric, dirt, damage or missing parts. Stop if anything prevents the connectors from operating normally.
Expected result: the chassis is open, stationary and ready for the approved car seat arrangement. No other attachment obstructs the connection points.
Adapter preparation
- Check orientation in the instructions. If the adapters have left and right positions or orientation markings, follow them exactly. Do not infer orientation from whichever side seems easier to insert.
- Fit the required adapters. Use the attachment method specified for your chassis and adapter set. Never force a connector into place.
- Perform the adapter security check. Follow the manual's prescribed check before adding the infant carrier.
- Keep the carrier supported. Bring it to the chassis only after the adapter arrangement is ready.
Expected result: every required adapter is correctly positioned and secured. If your approved setup uses no adapters, the chassis attachment points are prepared as instructed.
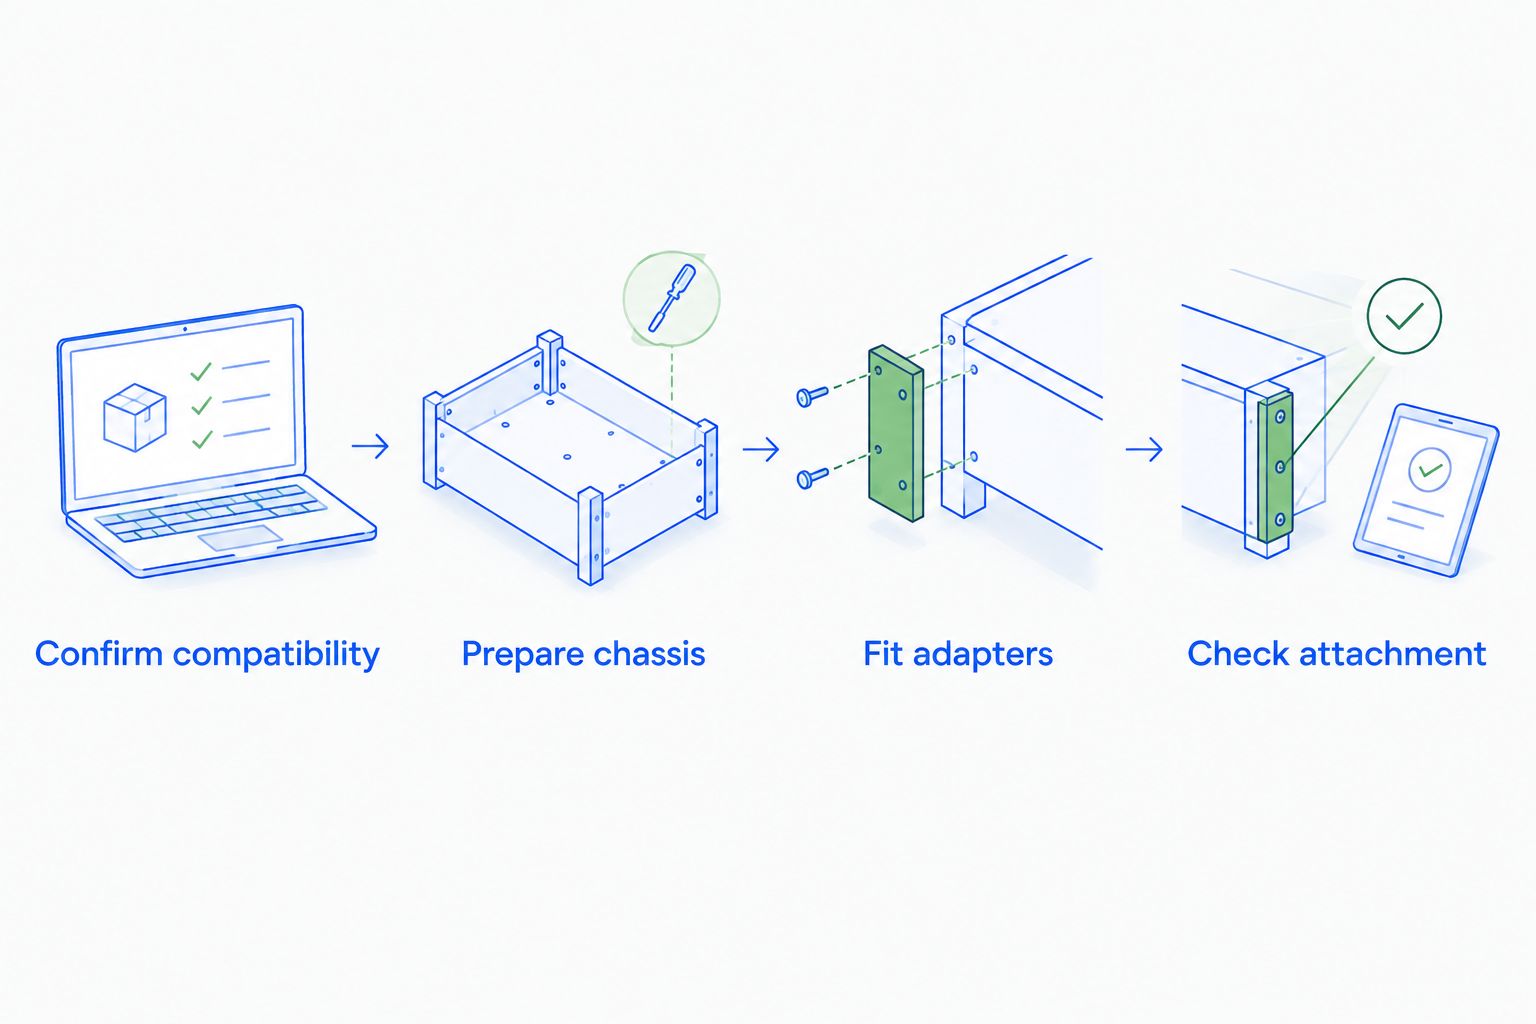
This sequence keeps the compatibility decision separate from the physical fitting work. Complete Confirm compatibility, Prepare chassis, Fit adapters and Check attachment in that order, treating adapter fitting as conditional on your instructions.
Attach the infant carrier and verify the connection
Carrier attachment
- Prepare the carrier handle. Put it in the position specified for carrying and attaching your exact model. Handle positions and their purposes are model-specific.
- Check the prescribed direction. Position the carrier according to the approved pushchair arrangement. Do not choose its direction simply to improve your view.
- Align the carrier with the connectors. Keep it supported while bringing the attachment points together using the method shown in the instructions.
- Complete the locking action. Use the manufacturer's procedure and check every required connection. An audible sound alone does not replace the prescribed security check.
- Check engagement before moving. Follow the manual's method for confirming that the carrier is attached. Never lift the whole pushchair by the car seat handle.
Expected result: the infant carrier is attached in the approved direction, and every required connection passes the manufacturer's check. If either side fails, keep the chassis stationary and correct the fit before use.
Practise the sequence with an empty carrier first, provided the manufacturer instructions allow that procedure. Learning the alignment and release controls without your baby inside removes an unnecessary distraction.
Baby and departure check
- Check your baby's position. Confirm that your baby is positioned and restrained according to the infant carrier instructions, including the harness fit.
- Check the carrier arrangement. Recheck the required handle position and any visible locking indicators specified for your model.
- Clear the moving parts. Keep blankets, straps and bags away from wheels, brakes and attachment points. Use only accessories permitted for the relevant equipment.
- Release the brake when ready. Move off only after the attachment and baby checks are complete.
Expected result: your baby is correctly restrained, the attachment is secure and nothing obstructs the chassis.
In 2026, a useful family routine is to say the checks aloud while learning: approved combination, locked attachment, correct harness, clear wheels. This is a memory aid, not a substitute for the product instructions.
Return the infant carrier from pushchair to car
The reverse workflow needs its own checks. Securing a carrier on the pushchair does not establish that it is correctly installed in the vehicle.
- Park and brake the chassis. Choose a level place beside the vehicle, clear of passing traffic.
- Prepare the vehicle installation. Make the approved base or belt route accessible, following the carrier and vehicle instructions.
- Support the carrier before releasing it. Use the correct handle position and the model-specific pushchair release procedure. Release controls differ; do not copy another parent's technique.
- Move the carrier into the vehicle. Install it using the approved base or seat-belt method for that seat and vehicle combination.
- Complete the vehicle checks. Check every required indicator, belt route and supporting component described in the instructions. Recheck your baby's harness after the transfer.
- Store the chassis and loose parts. Follow the folding instructions, including whether adapters must be removed. Secure equipment in the vehicle so it cannot move around.
Expected result: the infant carrier passes its vehicle-installation checks, and the pushchair is stored separately. The pushchair attachment check and vehicle installation check remain distinct.
For a 2026 routine shared with grandparents or another caregiver, demonstrate both directions. Someone who knows how to attach the carrier still needs to learn how to release it and reinstall it in the car.
Troubleshooting
The infant carrier will not engage
Stop and check the exact combination, adapter orientation and attachment direction. Inspect for trapped fabric or debris, then repeat only the fitting procedure described in the manual. Do not force the carrier or alter the connectors.
One connection appears secure but the other does not
Keep the parking brake applied and support the carrier. Remove and refit it according to the instructions, checking both connection areas. Do not move the pushchair with a partial attachment.
The release control will not operate normally
Stop pulling or twisting the carrier. Support it and follow the model-specific release instructions; check for an obstruction without dismantling the mechanism. If normal operation does not return, contact the manufacturer before further use.
The pushchair will not fold with adapters fitted
Check the folding section of the chassis instructions. Remove adapters if required, and never force the fold against a projecting part. Keep removed adapters together so the next setup starts with an identified set.
The baby slumps or appears uncomfortable
Stop and check your baby's position and harness against the seat instructions. If breathing appears abnormal, take immediate action and seek urgent medical help. For a premature baby or a baby with medical needs, obtain individual advice from the healthcare team before planning transfers.
Customise your workflow
Build the routine around your journeys, not around buying more equipment. Foryourlittleone travel systems are relevant to a broader buying comparison, but they do not establish compatibility with an existing Silver Cross infant carrier.
- For short errands: prepare the approved chassis arrangement before removing the carrier from the vehicle.
- For longer outings: take an appropriate alternative attachment and plan somewhere suitable to transfer your baby.
- For shared childcare: keep the model record and instructions with the equipment, then demonstrate attachment, release and vehicle installation.
- For replacement parts: identify the exact required part before ordering. Avoid buying several adapters to test by trial and error.
Review your 2026 routine whenever you change the carrier, chassis or adapter set. A previously approved combination does not automatically cover replacement equipment.
FAQ
Can I put any Silver Cross car seat on any pushchair?
No. Use only a combination explicitly approved for the exact infant carrier, pushchair chassis and any required adapters. Matching brand names or similar-looking connectors do not establish compatibility.
Do I need adapters to move a Silver Cross car seat onto a pushchair?
The approved combination's instructions determine whether you need adapters. Identify the exact carrier and chassis before choosing an adapter set; do not assume one is required or included.
Can I attach a Silver Cross car seat to a Foryourlittleone pushchair?
Use that combination only if the relevant manufacturer compatibility information explicitly approves the exact components. A travel-system listing or an apparently matching connector is not sufficient evidence.
How do I know the car seat is locked onto the pushchair?
Perform the attachment check specified in the manual for your exact combination. Check every required connection and indicator; do not rely solely on hearing a click.
Can I leave my baby asleep in the car seat after a transfer?
A car seat is not a replacement for a suitable flat sleeping surface. Transfer your baby to an appropriate sleep space after the journey and follow relevant infant sleep guidance.
Can I fold the pushchair with car seat adapters attached?
Follow the folding instructions for your exact chassis and adapter arrangement. Remove the adapters if required, and never force the folding mechanism.
What should I check before buying adapters in 2026?
Check the exact infant carrier model, chassis model and manufacturer-approved adapter identification before ordering in 2026. Confirm the fitting instructions and included components rather than choosing by appearance.
One last thing
A successful attachment is only half the transfer. Before your first outing, practise the release and return-to-car sequence too. Discovering an unfamiliar release control beside a busy road is avoidable.
Keep the exact model record with the equipment. That small preparation remains useful when another caregiver takes over or you need a replacement part.
